Renting or Buying a 3D Laser Scanner: How to Prepare
Most scanning projects that go badly went wrong before the instrument arrived. Not because of the scanner, but because nobody agreed what the deliverable was, nobody checked whether the site was accessible, and nobody worked out where 200GB of data was going to live.
This is the preparation list. Work through it before your scanner ships and the job itself becomes straightforward.
1. Decide what you are handing over
Start at the end. Everything else follows from it.
"A scan of the building" is not a deliverable. These are:
- A registered point cloud in E57, for a team that will use it as reference
- An RCP file that drops straight into Revit or AutoCAD
- A Revit model at an agreed level of detail
- A clash report against an existing design model
- A set of measured drawings
- A shareable web view for people who do not have CAD software
Ask the receiving team what software they use and what format they want, and get the answer in writing. Converting formats afterward is possible, but it costs time and some conversions lose information.
The deliverable also determines the tolerance, which determines the instrument. Get this backward and you will rent the wrong scanner.
2. Work out whether you need control
If the point cloud has to line up with a design model, with site coordinates, or with a scan you will take later, you need control, and that means a total station on site as well as a scanner.
This is the single most common thing people discover too late. The scan is finished, the data is good, and it is sitting in its own coordinate system with no way to tie it to anything.
You can skip control on a small building being captured for reference. You cannot skip it when the data feeds fabrication, ties to a model, or will be compared over time.
How control works and when you need it
3. Walk the site before the instrument arrives
Half an hour on site saves a day.
- What is in the way? The scanner records only what it can see. Stacked material, parked vehicles and stored equipment become permanent holes in your data. Some of it can be moved if you ask in advance.
- Where can you set up? You need somewhere stable for a tripod, with line of sight into the spaces that matter.
- Is there glass or polished metal? Both are difficult for any laser scanner. Knowing where they are lets you plan around them rather than discover the gap afterward.
- Access and timing. Who lets you in, what induction is required, when is the space quiet enough to work. Scanning an occupied building at 2pm gives you a point cloud full of people.
- Power and lighting. Batteries are finite. Somewhere to charge matters on a long day.
4. Sort out storage before you scan, not after
The number people underestimate most.
A single project can run to tens or hundreds of gigabytes of raw data. Registration and processing generate more. If your plan is a laptop with 200GB free, the plan will fail partway through the second day.
Before the instrument arrives:
- Confirm you have space for raw data, processed data and exports. Assume more than you think.
- Have fast external drives ready. Processing over a slow connection is painful.
- Decide the backup approach before the first scan, not after. Site data is not reproducible without a return visit.
- Check your processing machine can handle the job. Point cloud work is demanding on RAM and graphics.
5. Get the software sorted before the hardware arrives
Install, license and open the software before scan day. This is dull and it is the difference between a productive first morning and a wasted one.
Make sure whoever is processing has access, knows the workflow, and has opened a sample dataset. If the deliverable is going into Revit, confirm the import route works before you have real data waiting on it.
If the wider project team needs to view the data, look at a browser based viewer. Getting non-technical people into the scan without a CAD license is often the difference between a scan that gets used and one that sits on a drive.
6. Book training if anyone is new to it
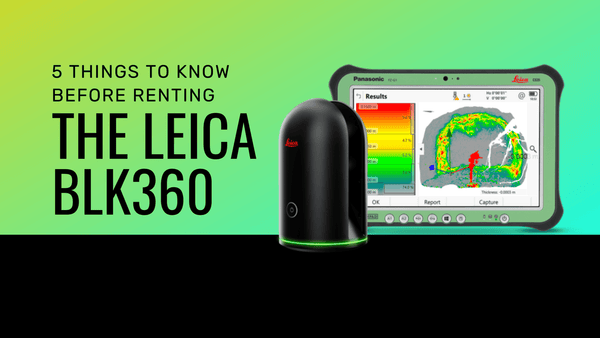
Modern scanners are approachable, and most people are productive on a BLK360 or an RTC series scanner within an hour. The instrument is not the hard part.
What training changes is method: how many setups, where to put them, how to place targets, how to check coverage before leaving site. That is where the difference between usable and unusable data lives, and it is not in the manual.
If your first project matters, half a day of training is cheap insurance. See training options.
7. Now decide: rent or buy?
Once you have worked through the above, this question answers itself more easily.
Rent when: this is a one-off or occasional project, you want to try an instrument before committing, your own scanner is in for calibration, or the project needs a capability you do not usually need such as aerial or long range capture.
Buy when: scanning is becoming a regular part of your work, roughly beyond a dozen project days a year, or the scheduling flexibility of owning is worth more than the capital.
Have it scanned when: you need the data rather than the instrument, and you scan a few times a year. Often the cheapest of the three once you account for training, software, storage and the learning curve.
We do all three, and we will tell you honestly which one fits. We would rather rent you the right thing twice than sell you the wrong thing once.
See rentals | Read the buying guide | Scanning services
The short version
- Agree the deliverable and file format in writing.
- Decide whether you need control, and book a total station if you do.
- Walk the site and clear what you can.
- Confirm storage and backup.
- Install and test the software.
- Book training if anyone is new.
- Then choose rent, buy or have it scanned.
Working through that list is most of the difference between a project that goes smoothly and one that needs a second visit.